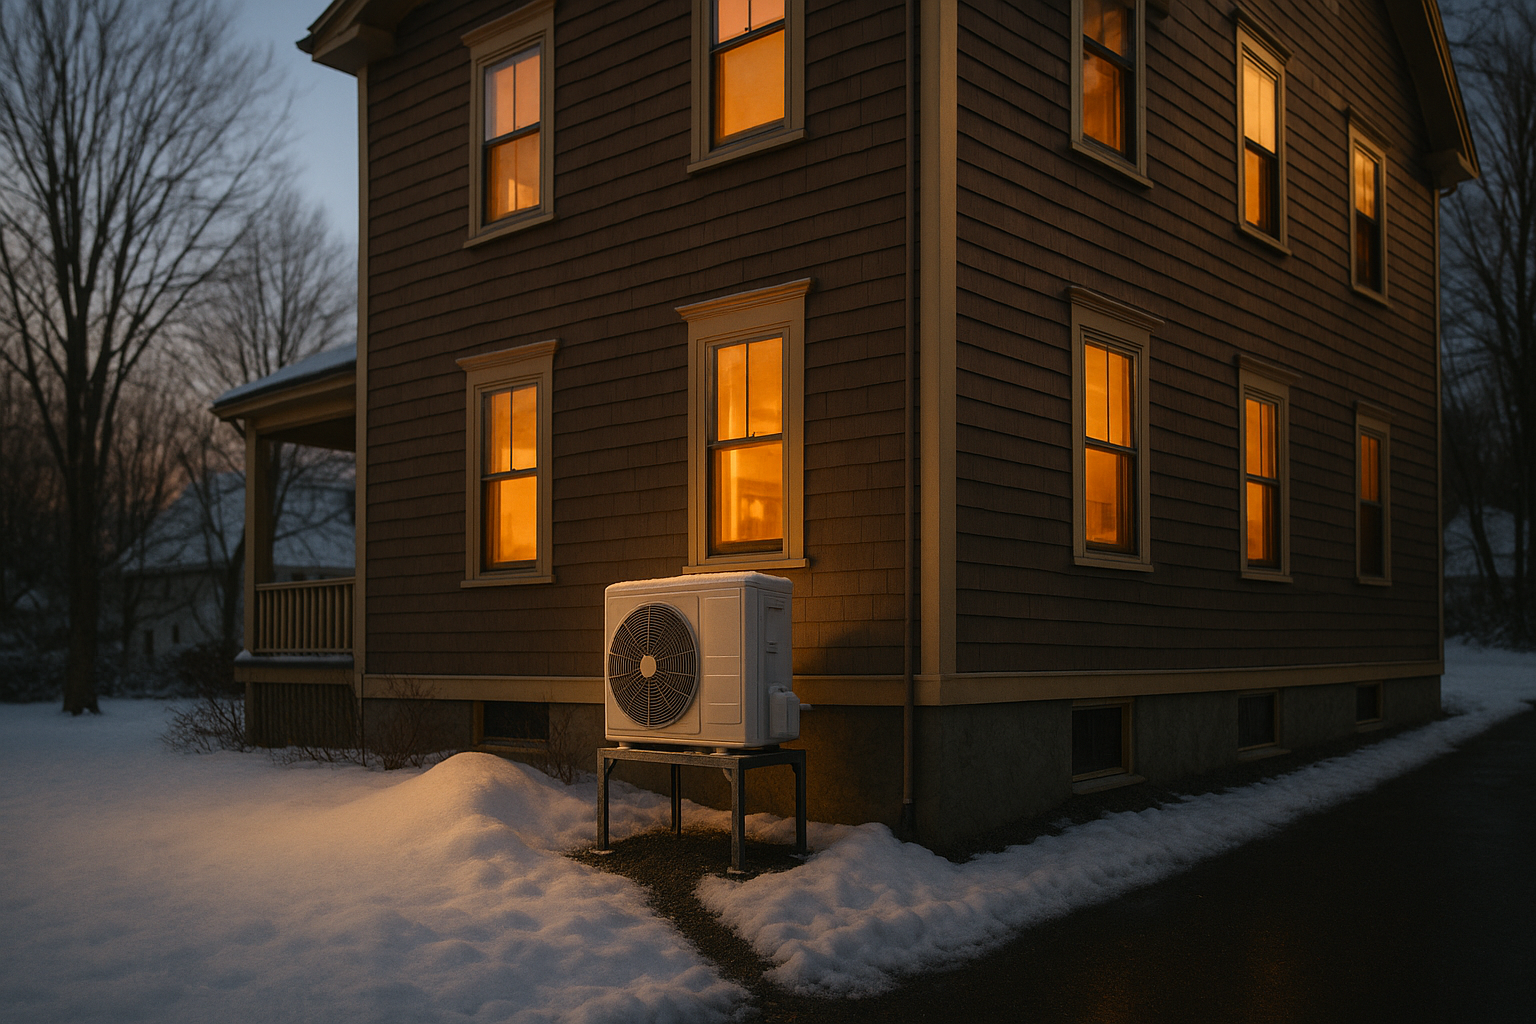
Do you know how deep the snow gets against the north wall of your house in a bad February? If you are about to put a cold-climate heat pump on that wall, you need to, because that number sets the mounting height and almost nothing else does.
Homeowners spend months on the equipment decision — capacity at design temperature, low-ambient output, compressor type — and then let the installer set the unit on a four-inch composite pad wherever the refrigerant line run is shortest. That pad is frequently the single detail that decides whether the system carries a January cold snap or ices into a block and locks out.
Placement is where the equipment specification meets the site conditions. The outdoor unit has to sit above the drift, drain what it melts, and stay inside whatever the local noise ordinance and side-yard setback allow.
The outdoor unit's base pan should clear the maximum expected snow depth at that specific wall, not the seasonal average. Field practice across the Northeast and Upper Midwest commonly lands at 18 to 36 inches on a stand.
Why A Correctly Sized Unit Still Fails On A Slab
A cold-climate heat pump selected against a 99% ASHRAE winter design temperature is built to pull usable heat from air that conventional equipment cannot work with. That capability depends on unobstructed airflow across the outdoor coil and on the machine's ability to shed the frost it accumulates.
Bury the bottom third of that coil in snowpack and both assumptions break at once. Airflow drops, the defrost cycle runs longer and more often, and the meltwater it produces has nowhere to go except the snow directly beneath the unit, where it refreezes.
What follows is a slow failure rather than a dramatic one. Capacity sags, the backup heat strips carry more of the load, and the utility bill that was supposed to validate the project starts reading like resistance heat.
Keep in mind that none of this shows up during a September commissioning visit. The unit passes startup, the technician records normal operating pressures, and the placement defect stays invisible until the first storm that drifts.
How High Should The Base Pan Sit?
Manufacturer installation manuals for cold-climate ducted and ductless equipment tend to state the requirement the same way: mount the unit so the base sits above the maximum anticipated snow accumulation for the site. That phrasing hands the number back to the installer, which is exactly why it gets guessed.
The better approach is to derive it. Three inputs matter — the design snow depth for the region, the drift behavior at that specific wall, and whether anything above the unit sheds snow onto it.
Translating Ground Snow Load Into Inches
ASCE 7 publishes ground snow load by location in pounds per square foot rather than in inches, so it does not hand you a mounting height directly. However, the standard pairs that load with a snow density relationship — density in pounds per cubic foot equal to 0.13 times the ground snow load plus 14, capped at 30 pcf — and that is what lets you back into an approximate depth.
The arithmetic is straightforward once you have both figures, since depth in feet is roughly the ground snow load divided by the density. A 40 psf ground snow load pairs with about 19 pcf of density and works out to a little over two feet of settled pack.
Be aware that this describes undisturbed ground snow on open terrain. It is a floor for the design conversation, not the answer for a spot beside a house where drifting, plowing, and roof discharge all stack on top of it.
ASCE 7 lists ground snow load in psf, not inches. Divide that load by the standard's snow density figure — 0.13 times the load plus 14, capped at 30 pcf — to approximate settled depth in feet, then add drift allowance.
Drift Lines, Roof Discharge, And Prevailing Wind
Snow does not settle evenly around a building. It scours off the windward face and deposits on the leeward side, and it builds a drift wherever an obstruction interrupts the flow — a fence, a bump-out, a stair rail, or the outdoor unit itself once it is in place.
The leeward wall is exactly where installers prefer to put outdoor units, because it is out of sight and out of the wind. That is also where the deepest accumulation of the season collects.
Roof geometry compounds the problem. A metal or steep-slope roof sheds its entire snow load in a single event, and a unit sitting in that discharge path takes a mass of wet snow and ice at speed.
Of course, a snow guard or a simple diverter above the unit costs a fraction of a compressor. Where the discharge path cannot be moved, the placement has to move instead.
Three Locations To Rule Out First
A spot under a roof valley or shed path, a spot inside the plow throw zone at the end of a driveway, and a spot tight against a wall bump-out that will build a drift. Each one loads the unit with substantially more snow than the regional design depth predicts.
Snow Stands, Wall Brackets, And Elevated Platforms
Once the target height is known, there are three common ways to reach it, and they trade off differently on cost, vibration, and winter serviceability. Here is how the three compare in practice:
| Mounting method | Typical clearance gained | Best fit | Watch for |
|---|---|---|---|
| Ground snow stand | 18 to 36 inches above grade | Most retrofits, and heavier ducted outdoor units | Frost heave under shallow footings; the stand must carry operating weight plus accumulated ice |
| Wall bracket | Set by installer, often 24 to 48 inches | Ductless outdoor units on solid framing | Vibration transmitted into the wall; isolation grommets and solid blocking required |
| Elevated platform or roof curb | Highest available clearance | Deep-snow sites and tight urban lots | Winter service access; drainage path off the structure; structural review |
The ground stand is the default for good reason, since it keeps service access at grade and keeps compressor vibration out of the building envelope. Wall brackets win where there is no room for a stand, though they need solid blocking and isolation hardware, because a wall-mounted inverter compressor running at high speed on a cold night is audible inside the room on the other side of that sheathing.
A ground snow stand keeps service access at grade and keeps compressor vibration out of the structure. Wall brackets clear deeper snow but transmit vibration into framing unless isolation grommets and solid blocking are used.
Clearances Are Measured From The Unit, Not From The Snow Line
Height and clearance are separate requirements, and satisfying one does not satisfy the other. Manufacturer coil-side, discharge-side, and service-side dimensions are measured from the cabinet itself, and they are the first thing a drift consumes.
A unit mounted 24 inches up with a required 12-inch coil clearance still needs that 12 inches to stay open through the storm. Accordingly, the practical clearance question is what remains available after the snow that is going to arrive has arrived, rather than what the manual requires in still air.
There is also a ceiling on how high is useful. Elevating past comfortable service reach makes coil cleaning, filter-drier work, and refrigerant service harder in exactly the season when the unit is most likely to need attention.
Defrost Drainage And What Happens Under The Coil
Every air-source heat pump operating below roughly 40°F accumulates frost on the outdoor coil and periodically reverses to melt it off. That water exits through the base pan drain openings, and during heating season it lands on whatever sits below the unit.
Frost accretion is worst in the damp band roughly between 25°F and 40°F, where the air still holds enough moisture to load the coil quickly. In fact, cold and dry air near 5°F frosts more slowly, which is why the ugliest ice problems tend to appear in shoulder-season storms rather than in the deepest cold of the year.
How often that cycle runs is itself a design variable, and it interacts with equipment selection. Our breakdown of defrost cycle frequency and capacity derating covers the sizing side of the same problem.
The Ice Pillar Failure
When the base pan drains onto packed snow or a flat pad, the meltwater refreezes in place and builds upward, cycle after cycle. The result is a column of ice that grows toward the bottom of the coil and then keeps going.
Once that column bridges to the cabinet, the fan blade, the base pan, and sometimes the lower coil rows are locked into it. This is the failure that turns a correctly specified cold-climate unit into an emergency service call during the first hard week of January.
Drainage Details That Survive Multiple Winters
The remedy is to give meltwater somewhere to go and to keep the space beneath the unit open. The details that hold up over several seasons include but are not limited to:
- An open air gap under the base pan. The stand or bracket should leave clear space below the cabinet so water falls free instead of pooling on a surface in contact with the pan.
- A drainage bed rather than a slab. Crushed stone or a gravel sump under the unit lets meltwater percolate instead of sheeting across a frozen pad and refreezing at its edge.
- A base pan drain kit where the manufacturer offers one. Many cold-climate units accept a drain fitting or a heated drain line that routes water out of the footprint entirely.
- No roof runoff aimed at the unit. Adding a downspout's discharge to the coil's own meltwater accelerates the ice column faster than anything else on this list.
- A drainage path away from walkways. Meltwater that migrates onto a path refreezes as a slip hazard, so the grade below the unit should carry water away from where people walk.
- Separation from the foundation. Repeated freeze-thaw cycles against a foundation wall are worth avoiding for the same reason downspouts get extensions.
All of these reduce to one principle, which is that the unit has to shed its own water without that water returning. A stand that clears the drift but sits above a flat frozen slab solves half the problem and leaves the other half to build all winter.
Defrost meltwater has to fall clear of the base pan and drain away. A gravel bed with open air space beneath the unit prevents the ice column that otherwise bridges upward into the coil and fan.
Base Pan Heaters And Where They Stop Helping
Most cold-climate outdoor units include or offer a base pan heater, a resistance element that keeps the drain openings from icing shut during defrost. It is a genuinely useful component, and it addresses a narrower problem than most homeowners assume.
The heater keeps water moving through the pan. It does nothing about snow packed against the coil face, and it does nothing about an ice column forming below the unit out of water the heater successfully drained.
There is a parasitic load to account for as well. A base pan heater cycling through a long cold spell adds consumption that never appears in the equipment's rated efficiency, which is one more reason placement that avoids the problem outperforms hardware that manages it.
Control strategy matters here too, since how the system decides when to switch to backup and when to initiate defrost changes how hard the pan heater works. Our guide to balance point and control strategy covers those settings in detail.
Sound Ratings And What They Constrain
Height and drainage push the unit toward open, elevated, unobstructed positions. Sound limits push back, and on a narrow lot they are frequently the binding constraint.
Outdoor unit sound is rated under AHRI Standard 270, which reports an A-weighted sound rating derived from sound power at rating conditions. AHRI Standard 275 is the companion application standard that estimates what a listener actually experiences given distance and site geometry.
That distinction matters because a spec sheet figure and a property-line figure are different quantities. A published rating in the mid-50s dBA does not mean a neighbor hears mid-50s dBA at the fence.
Distance, Reflection, And Cold-Weather Operation
Sound pressure from a point source falls roughly 6 dB with each doubling of distance in an unobstructed field. Moving a unit from five feet off the property line to ten feet is therefore worth a meaningful reduction on its own.
Reflective surfaces work in the opposite direction. Each hard boundary near the unit adds sound back into the field, and a cabinet tucked into an inside corner formed by two walls is close to the worst case available on a typical lot.
Cold weather adds a factor most homeowners do not anticipate. Inverter compressors run at their highest speeds when it is coldest, so the quiet a unit exhibits during a mild-weather startup is not what it produces at design temperature — a behavior inherent to how enhanced vapor injection and inverter compressors hold capacity in deep cold.
Sound pressure drops about 6 dB per doubling of distance, so moving a unit from five to ten feet off a property line is a real reduction. Nearby walls and fences reflect sound back and offset part of that gain.
Setbacks, Ordinances, And Screening
Local rules constrain placement in two separate ways, and they are often administered by different offices. Zoning setbacks govern where mechanical equipment may physically sit relative to a lot line, while noise ordinances govern the measured level at that line.
Residential nighttime limits in many municipalities fall somewhere in the 45 to 55 dBA range at the property boundary, though the threshold, the measurement point, and the quiet hours all vary by jurisdiction. Note that the only reliable source is the municipal code for the specific address.
Homeowner association rules add a third layer where they apply, sometimes with screening requirements that conflict directly with manufacturer clearance dimensions. Screening that blocks airflow to the coil trades a sound problem for a capacity problem.
Zoning setbacks and noise ordinances are separate rules, often administered by different offices. Both should be verified against the municipal code for the specific address, since limits and measurement points vary widely.
A Placement Sequence That Works Backward From The Constraints
Placement decisions go wrong when they start from the refrigerant line run. Working the constraints in order of how expensive each is to correct later produces a better outcome, and here is the sequence:
- Establish the design snow depth. Start from the ground snow load for the address, convert it to an approximate settled depth, and treat that figure as a minimum rather than a target.
- Map the drift and discharge zones. Identify leeward walls, roof shed paths, plow throw, and any obstruction that will build a drift, then eliminate those locations from consideration.
- Check the sound envelope. Measure distance to each property line, note reflective surfaces and inside corners, and confirm the applicable setback and noise limits with the municipality.
- Select the mounting method. Choose the stand, bracket, or platform that reaches the required height, carries operating weight plus ice, and preserves manufacturer clearances.
- Detail the drainage. Specify the gravel bed or drain kit, confirm the air gap beneath the base pan, and route meltwater away from walkways and the foundation.
- Run the line set last. The refrigerant line follows the placement decision rather than driving it.
What this sequence does is force the irreversible decisions to the front of the process. Line sets can be rerouted and lengthened within manufacturer limits, while a unit set two feet too low in a drift line stays too low until somebody pays to move it.
The sequence also assumes the capacity work is already finished, since placement cannot rescue an undersized machine. Our walkthrough of cold-climate heat pump sizing at design temperature and the heat pump load calculator cover that step, and the broader heat pump selection guide connects the equipment and installation decisions together.
Where Incentive Programs Touch Placement
Program administrators care about installation quality more than most homeowners expect, because measured savings depend on it. Mass Save, NYSERDA, and Efficiency Maine each run quality-installation requirements alongside their heat pump incentives, and manufacturer installation instructions are typically incorporated by reference.
HEEHRA rebates are state-administered, so inspection and documentation requirements vary by state and by program year. Where a program performs post-installation verification, an outdoor unit set below the manufacturer's stated snow clearance is a documentable deviation from those instructions.
Demand-response programs add a further dimension. ConnectedSolutions-style offerings in the Northeast pay for controllable load during peak events, and a unit that ices and locks out is a unit that cannot participate.
The practical implication is that installation documentation carries weight beyond the closeout packet. The manufacturer's mounting requirement, photographs of the finished clearance, and the stand or bracket specification are what a verifying program — or a warranty administrator reviewing a cracked base pan — will ask to see.
Common Questions About Cold-Climate Outdoor Unit Placement
A handful of questions come up on nearly every snow-country installation. The answers below cover the ones that most often change a placement decision.
Does a snow stand replace the base pan heater?
No. The heater keeps drain openings clear during defrost, while the stand keeps the coil above the drift and lets meltwater fall free. Deep-snow installations generally need both, because each one solves a different half of the ice problem.
How do I find the design snow depth for my address?
Start with the ASCE 7 ground snow load for the location, published in pounds per square foot. Divide by the standard's snow density figure — 0.13 times the load plus 14, capped at 30 pcf — to approximate settled depth, then add allowance for drifting at the specific wall.
Can the outdoor unit sit under a roof overhang?
An overhang helps only if nothing sheds onto the unit from above. Metal and steep-slope roofs release their whole snow load in one event, so a snow guard, a diverter, or a different wall is usually required before that location works.
Is a wall bracket louder than a ground stand?
A wall bracket does not change the unit's sound rating, but it couples compressor vibration into the framing, which can make the unit more audible indoors. Isolation grommets and solid blocking behind the bracket reduce that transmission substantially.
How much sound reduction does distance actually buy?
Roughly 6 dB per doubling of distance in an open field. Reflective surfaces such as foundation walls, fences, and inside corners add sound back, so a longer setback in a corner can underperform a shorter setback in the open.
Does elevating the unit affect the refrigerant line set?
Height changes the vertical separation between indoor and outdoor units, and manufacturers publish maximum lift, total line length, and additional charge per foot. Those limits are worth confirming against the intended mounting height before the stand is set.
This article is for informational purposes and is not financial, tax, legal, or medical advice. Consult a licensed professional — a CPA, a qualified HVAC contractor, or your state energy office — before acting.